Previously: Tools in Use
Building an ASP.NET Core IdentityServer Implementation
This is where the articles start to get a bit longer. I've broken a couple up into a-b parts. We won't be talking about tasks in k8s for a bit, so if you want to skip on to that, you can go here.
There are, in my opinion, 2 parts that need to be considered when building up this IdentityServer4 implementation, and the 2nd part can arguably be split into 2 smaller parts, which is how this implementation is built.
The first part of the system needs to be the Security Token Services (STS) implementation. This part of the system is simply responsible for managing tokens. This means validating log in credentials, creating tokens, refreshing tokens, and sending along the appropriate metadata and claims. I would want this broken into a separate service because it will probably have different operational characteristics then the other parts of the application, and so we can scale is separately. If there are 1000s of request per minute to generate/validate/refresh tokens and send along metadata, that is different than administrating the data that the system relies on. Additionally, it makes it easier to secure the administrative access if it is a separate application.
The second part of the system is the Administrative (Admin) implementation. The application that provides a user experience that will help identity administrators do the right things.
In our implementation, which is based on the Skoruba project, there is actually a third part to the administrative side of the system and that is a Admin WebAPI that does all of the actual CRUD on the database. I'm happy with this setup and I'm glad the Skoruba project went in this direction.
Let's get into the details of what I did.
Start Learning with the IdentityServer4 Quickstart
If you are new to IdentityServer4 or even newer to OAuth2 and OpenID Connect, your first stop needs to be the IdentityServer4 Quickstarts. These quickstart modules will walk you through all of the steps required to incrementally build an IdentityServer4 server. They are all self-contained, building your knowledge from one to the next, and by the end of the quickstarts, you've built a functional IdentityServer4 implementation. I'm not going to re-produce any of these quickstarts or even how to get you started on them, other than providing the link and some encouragement. Go do the quickstarts, then come back here and continue reading!
It was during the quickstarts that I side-stepped and did the Pluralsight courses on OAuth2 and OpenID Connect.
Starting your project with Skoruba
So, you've done the quickstarts, or you're already experienced with IdentityServer4 and the real reason you are here is because the quickstarts left you wanting more! You wanted an Administrative application!! You wanted databases to persist all of this configuration and the quickstarts don't give you any of that! You're in the right place! I was in that position just a little while ago myself.
After doing the quickstarts, I realized I had to build/find an administrative experience for our platform. It isn't hard to find a couple when you google IdentityServer4 Administration. There are a number of Github repos that you'll find, and perhaps a couple products that you can purchase. Again, because of the desire to build/own vs. buy/subscribe, we continued looking until we found the Skoruba IdentityServer4 Admin project on Github. This is a great project and I've been very happy that I found it. It is put together well and is super easy to get started with.
In order to use the project, you'll need to have the latest ASP.NET Core 3.x SDK and development tools.
The first thing I did was get the awesome template that the Skoruba team build to get you started using their project. This command tells the dotnet tooling to go off to nuget.org and get the template.
dotnet new -i Skoruba.IdentityServer4.Admin.Templates::1.0.0-rc1-update2
Once you have the template, you are ready to start creating your solution. You can start by using the template.
1 | dotnet new skoruba.is4admin --name MyProject --title MyProject ` |
A couple notes about that command that make sense once you have done the ID4 Quickstarts:
-adminrole IdentityAdminRoleis the User Role that will be used in the Admin application and the AdminAPI to know if a user is an administrator of the Identity system. This role will be assigned to your admin user account.-adminclientid MyClientIdis the ClientId (username of your application) for the Admin application in the STS. Your Admin application needs this id to be allowed to access the STS.-adminclientsecret MyClientSecretis the ClientSecret (password of your application) for the Admin application in the STS. It is used with ClientId.
Since we are planning to run this all in Docker locally and eventually deploying this to a k8s cluster, Docker support is required. All of the yaml examples in this post are in the docker-compose.yml file.
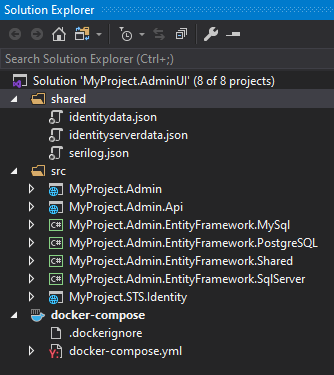
Once that command has run, you should have a project that looks something like this:
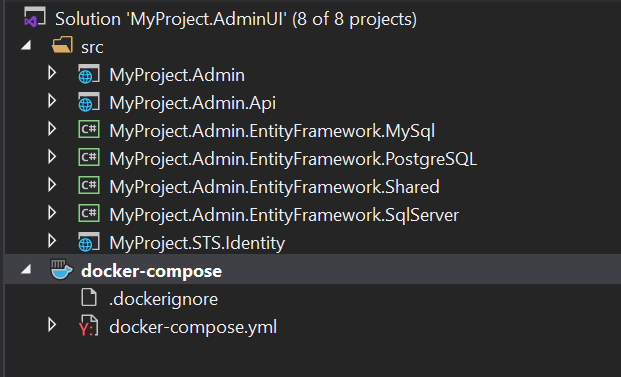
Select your DB Platform
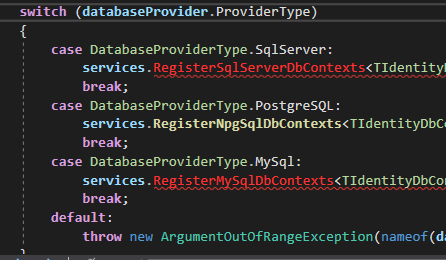
One of the cool things about the Skoruba template is that it comes out of the box with 3 different database persistence mechanism already waiting for you. You can just select the one you want to use, and off it goes. I don't need to provide the ability to switch mechanisms, so I'm simply going to remove the templated MySql and SqlServer options.
If you are planning to use SqlServer in your k8s cluster, you can skip these instructions and the next Postgres/pgAdmin4 instructions. You could delete everything except for SqlServer implementation details. I understand why the template spits it out, but your running application probably won't need persistence choices.
So you selected PostgreSQL
PostgreSQL (Postgres) is an open-source database that is more than sufficient for our use-cases. It is free to use/run and has great support in the community. In order to minimize costs, I choose to use PostgresSQL.
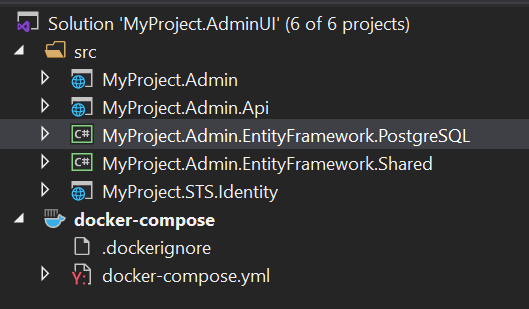
The first thing I did was delete the MySql and SqlServer projects. I wasn't planning to use them and as such, just deleting them is the right course. They can always be put back in if the need ever arose to migrate to a different database platform. This is going to immediately break your solution. You can just go and delete/fix all of the broken code. You're just removing using statements and adjusting/removing if {} blocks. I also deleted all of the database types/selection code and configuration settings.
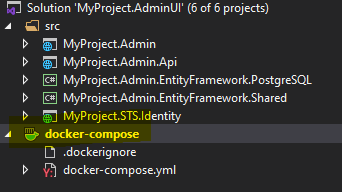
That should leave you with a solution that builds and that only contains these projects.
You probably also want to delete the db entry in the docker-compose.yml file. The SqlServer image is a large image and you don't necessarily need to download it.
1 | # remove this entry |
In case you didn't know, Docker Desktop is the local image registry for all things Docker on your Windows workstation. All images will be downloaded and cached here. Docker Desktop is not the local image registry for k8s (minikube).
Backend Containers - Postgres, pgAdmin4 & Seq
Now, your solution is building and ready to run, but our local infrastructure isn't quite there yet. We're going to need a Postgres database instance on our local machine to run this in Visual Studio, so we can do that in the docker-compose.yml file.
To bring a Postgres database container into Docker Desktop, add the following:
1 | postgresdb: |
What this does is get the latest version of the Postgres container image from DockerHub. It exposes the default Postgres port of 5432, gives this container an alias in the DNS of postgres, and hooks the container up to a persistent volume, mapped to a volume on the local host, to store its identity data. We need to add that mapping near the bottom of the existing docker-compose.yml file. We will add a mapping for pgAdmin4 while we are at it.
1 | volumes: |
There is a lot of YAML in k8s and docker. You are going to have to become familiar with it. I'm going to assume that you'll work through any yaml syntax errors that may come out of working through the articles.
After adding in Postgre, we can now add in our pgAdmin4 container instance. pgAdmin4 is a database management tool built as a web application. If you have another Postgre management tool, you don't need to follow these steps.
1 | pgAdmin4: |
The pgAdmin4 container doesn't need an alias. We gave the Postgre instance a DNS alias so that all of the running containers in the cluster can simply reference the database (in the connection string) by the DNS entry of postgres. The IdentityServer4 apps and pgAdmin4 don't really need this kind of mapping so we'll leave them as accessible at the http://127.0.0.1.xip.io:port addresses.
If you want to explore more options in the pgAdmin4 configuration that are available to you, you can go to the pgAdmin4 Container Configuration page for more details.
We're also going to add a Seq instance into our docker-compose.yml file.
1 | seq: |
When I added the Seq container, I did not give it a persistent volume on the host to store log data. In the case of Seq, I'm using it for transient purposes in docker so I don't really care if the history of log entries goes away when the container is re-started. If you do want to keep your log files, you can give it a persistent volume on the host, in the same way as the databases.
Persistent Volumes do not survive a Docker Desktop data purge.
We are going to add one more little container that I want to introduce now before it really appeared in my story, but I wish that I had found it earlier. It is a small little container from Google that helps me do DNS diagnostics and debugging in the containers/k8s network. You can quickly and easily add this container at just about any time, do your diagnostics, and then remove it from the cluster. It automatically stops after 1 hour as well.
1 | dnsutil: |
Configuration Changes
We aren't quite ready to run things yet. We need to make some more configuration adjustments.
You should be prepared to make a lot of configuration adjustments in your IdentityServer4 and k8s career!
Here are the things I've done to make this easier/cleaner for running locally.
- Change all usernames to admin
- Change all admin passwords to P@ssw0rd!
- Change all Role entries to IdentityAdminRole
- Delete all of the unnecessary launchSettings profiles
- Tweak the URL configuration values
- Change all of the database connection strings to point at our local Postgres instance
- Tweak the code to always run migrations and seeding data on startup
- Configure Serilog to use Seq and the console
Change Credentials and Role
You will have lots of chances once you've explored and learned about all of these configurations to change usernames, potentially move to Azure Managed Identities, or use something like Azure KeyVault to store your credentials. For the time being, we want this to be quite easy to do, so we're going to simplify this and make all the admin accounts the same.
- Postgres - If you revisit the Postgre yaml snippet, you see the default Postgre power user is admin and P@ssword!.
- pgAdmin4 - You'll see that the pgAdmin4 wants an email address, so in the yaml snippet we see the username admin@codingwithdave.xyz and P@ssw0rd!
- Seq - currently requires no authentication
There are three .json files in a file in the root of the solution called shared. These files hold seed data for the applications. They are joined to the docker containers and are used by the running instances of the applications when they are in docker. You need to edit the copies of these files.
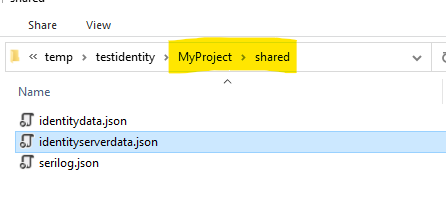
I added a solution folder to the solution and added these files to it.
I changed the following:
- identitydata.json
- change the initial username credentials to admin and P@ssw0rd!
- change the Roles entry to IdentityAdminRole.
In the three projects, we need to make a few tweaks in the appsettings.json files. I did this for a little added clarity.
- appsettings.json in MyProject.Admin
- appsettings.json in MyProject.Admin.Api
- appsettings.json in MyProject.STS.Identity
- change the AdminApiConfiguration:AdministrationRole to IdentityAdminRole
Here is an example from the STS appsettings.json file.
1 | "AdminConfiguration": { |
Delete Unnecessary LaunchSettings Profiles
This one is fairly simple and just a cleaning exercise. I can debug with Docker Desktop and the DockerCompose project, so good riddance to all the other clutter! I don't plan to run this in IIS or single Docker containers, so I can remove those profiles and settings. I will leave the Kestrel settings since I can envision someone doing that. Otherwise, I'm only planning to run ecosystem this via DockerCompose or sending it to a k8s cluster.
1 | { |
becomes
1 | { |
Repeat for all of the launchSettings.json files.
The URL configuration values
Identity implementations require a lot of information about people and applications in order to work. One of those pieces of information is the URL of the caller. The Skoruba template spits out all of the URLs in the form of 127.0.0.1.xip.io. These URLs are using the xip.io service provided by the makers of Basecamp. This DNS server basically takes the DNS entry request, pulls the IP address out of it, and send that IP address base as the resolved IP. You can basically get a public DNS to resolve to an IP address that is your local machine.
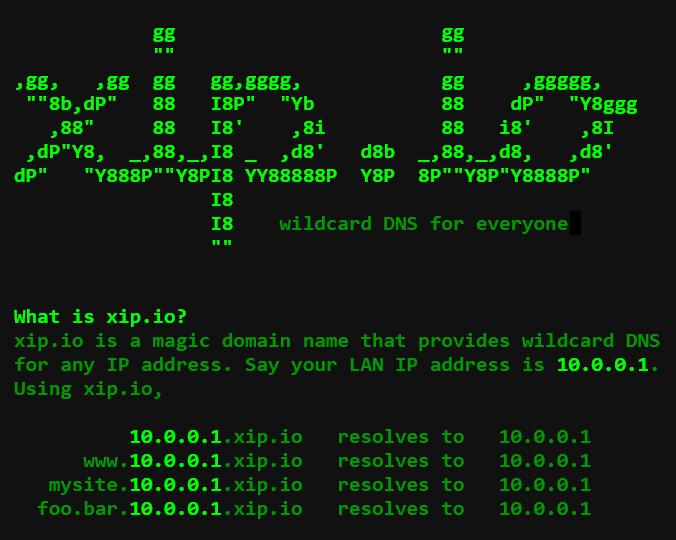
One thing I found while looking over the project was a blend of localhost configurations and 127.0.0.1.xip.io. Because of the way that xip.io works, we can get rid of all of the localhost references. So, you can do a Replace in Files and replace all of the localhost with 127.0.0.1.xip.io.
We could also replace all of the 127.0.0.1.xip.io with lvh.me which is a public DNS entry that resolves to 127.0.0.1 as well. This link describes lvh.me and some other good utilities.
These URLs are in the launchSettings.json file and the appsettings.json. Remember that in ASP.NET Core applications, by convention the environmental variable configurations are loaded last and overwrite anything in the appsettings.json files.
One thing about configuration in this adventure is making sure that your configuration supports anywhere you run. That is why you see this crazy overlap of appsettings.json files or environmental variables managed all over the place. You have to develop a good understanding of how the configuration systems work in the runtime environments and take advantage of them.
While we are doing this work, I also adjusted the ports that everything lives at. There are some mistakes in the Skoruba template that state that the Admin API is at 5001. So in this exercise I've set:
- STS to port 80 (no port)
- Admin is at port 9000
- Admin API is at port 5000
These go along with pgAdmin4 already being at port 5050 and Seq being at port 5341.
Database Connection strings
The Skoruba uses 5 different DbContext to do its work. This in theory allows you to maintain smaller, more specific entity sets and could also spread some of this persistence work across different servers, but in practice, we'll only use one server. You can replace all connection strings with this one connection string.
1 | Server=postgres; User Id=admin; Database=identity; Port=5432; Password=P@ssw0rd!; SSL Mode=Prefer; Trust Server Certificate=true; |
Notice that we can reference the Postgre DB at its DNS alias of postgres.
Tweak Code to Run Migrations Always
You can see that the Skoruba team already had this idea in mind when they created the template. You just need to make the switch in Program.cs around line 32 and the MyProject.Admin project.
1 | // Uncomment this to seed upon startup, alternatively pass in `dotnet run /seed` to seed using CLI |
Configure Serilog to use Seq
This is going to require a little bit of work in Visual Studio. The Skoruba template already makes use of Serilog as the logging engine, but it doesn't have the Seq sink that will be used to send all of the structured log messages to Seq. We need to add that bit to the Identity applications.
- Add the
Serilog.Sinks.Seqpackage to all three Identity projects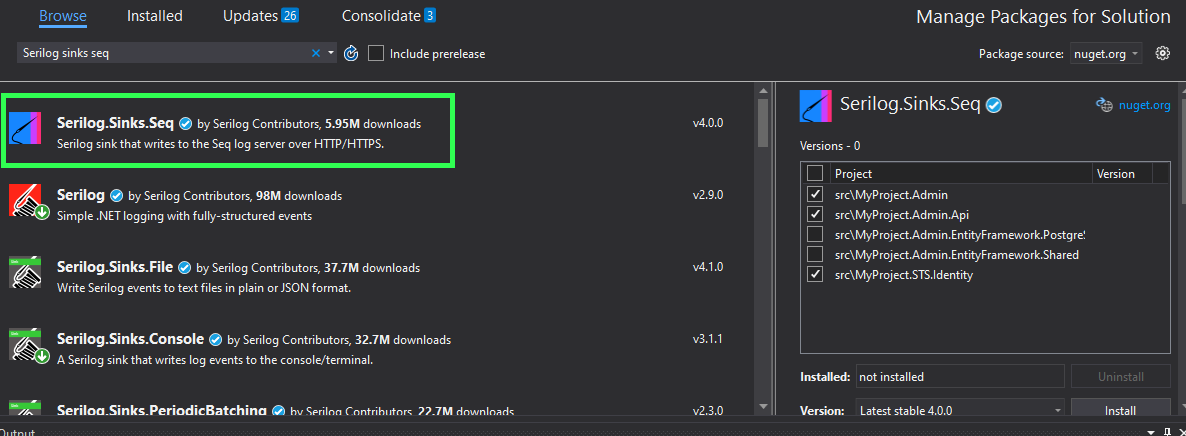
- Change the configuration in the /shared/serilog.json file that will be used by the docker containers.
1
2
3
4
5
6
7
8
9
10
11
12
13
14
15
16
17
18
19
20
21
22
23
24
25
26{
"Serilog": {
"Using": [ "Serilog.Sinks.Console" ],
"MinimumLevel": {
"Default": "Debug",
"Override": {
"Microsoft": "Information",
"System": "Error"
}
},
"WriteTo": [
{
"Name": "Console",
"Args": { "outputTemplate": "[{Timestamp:o}][{Level:u4}][{SourceContext}] {Message}{NewLine}{Exception}" }
},{
"Name": "Seq",
"Args": { "serverUrl": "http://seq:5341" }
}
],
"Enrich": [ "FromLogContext", "WithMachineName" ],
"Properties": {
"Product": "IdentityServer4",
"Platform": "Docker"
}
}
} - Optional Change the individual serilog.json files in each project to approximately match. Remember that the docker containers all use the shared/serilog.json file, not the individual serilog.json file via the
volumes:directive1
2
3
4volumes:
- "./shared/serilog.json:/app/serilog.json"
- "./shared/identitydata.json:/app/identitydata.json"
- "./shared/identityserverdata.json:/app/identityserverdata.json"
Ready to run
Alright! We've scaffolded the IdentityServer4/Skoruba applications, we've put all of our infrastructure in place, and we've adjusted all of our configuration! We should be ready to run this application!
- Select the docker-compose project in the solution explorer!
- You should see only the docker-compose option in the Visual Studio Run button
- Run your docker-compose orchestration!
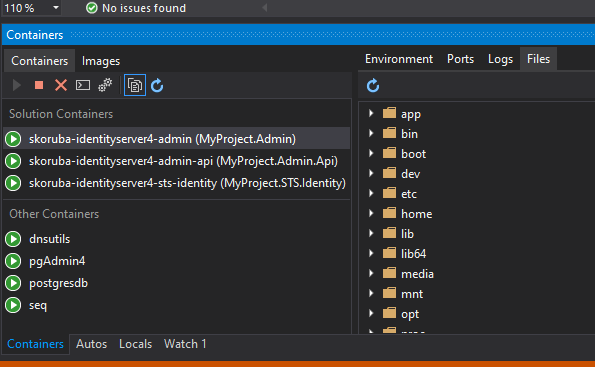
Now we can start to explore what we've got running in the container network.
- pgAdmin4
- Seq
- STS
- Admin
- AdminApi
pgAdmin4
You should be able now to navigate to http://127.0.0.1.xip.io:5050 in order to see the pgAdmin4 login screen.
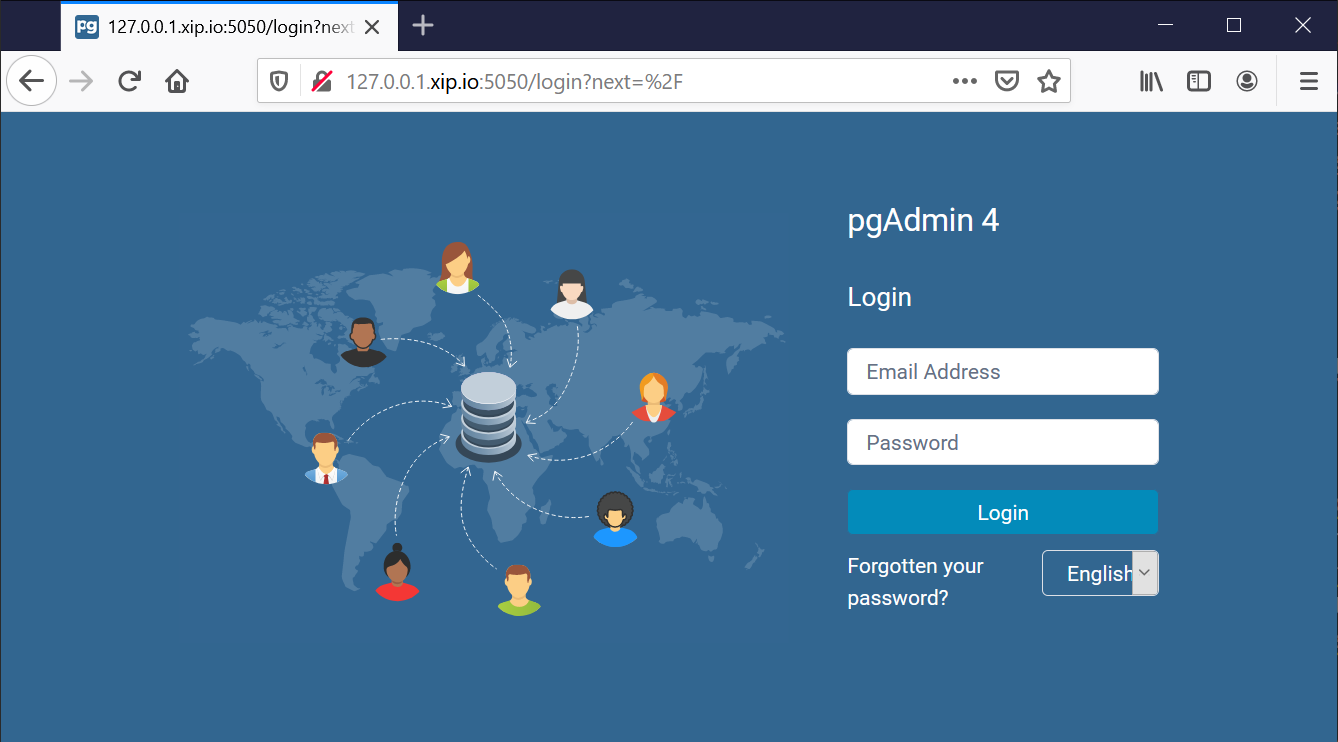
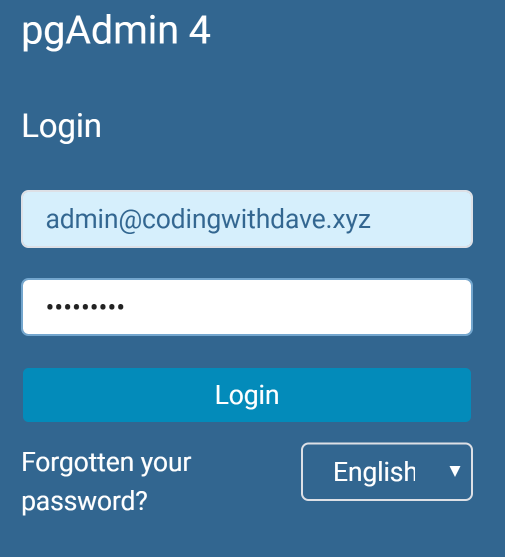
Now we enter our login credentials that we set in the pgAdmin4 section in the docker-compose.yml file.
1 | pgAdmin4: |
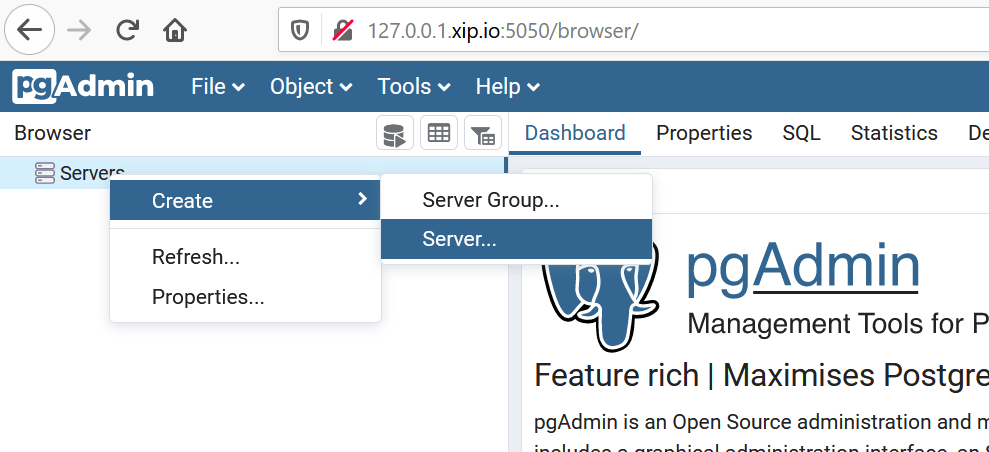
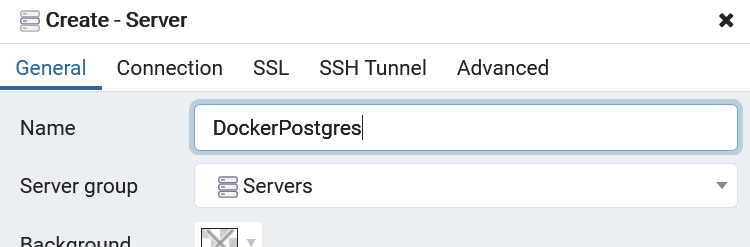
Once we've logged in! We need to add a connection to the Postgre database into pgAdmin4.
- Create Server Listing Entry
- Enter server location (DNS)
- Enter Postgre server admin credentials
1
2
3
4
5
6
7
8
9
10postgresdb:
image: postgres:alpine
hostname: postgres
ports:
- "5432:5432"
container_name: postgresdb
environment:
- "POSTGRES_USER=admin"
- "POSTGRES_PASSWORD=P@ssw0rd!"
- "POSTGRES_DB=identity" # this is the DB name that will be generated by EFCore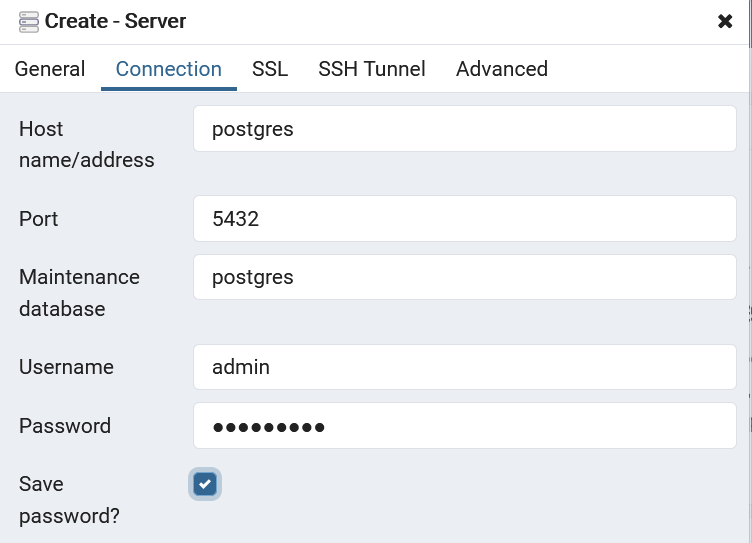
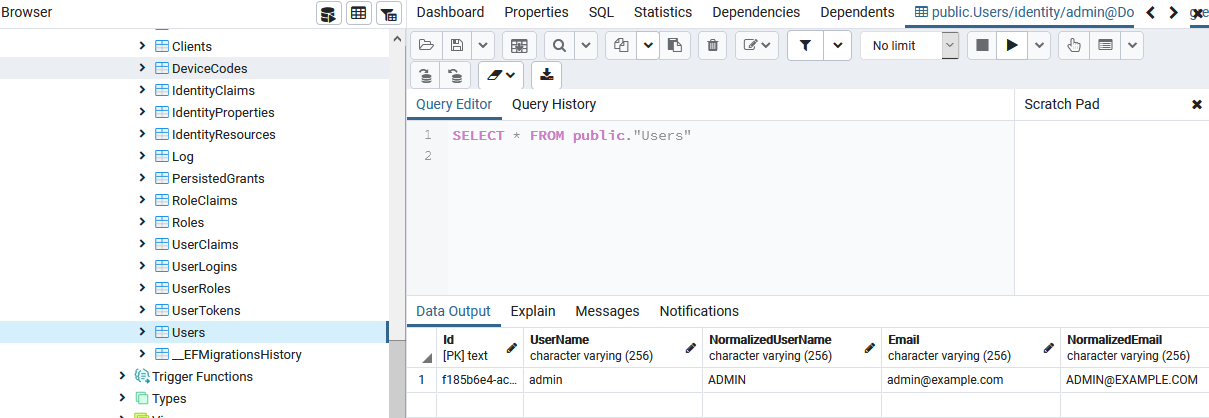
And voila! We can administer our Postgre-based Identity store that is used by the 3 applications in the platform!
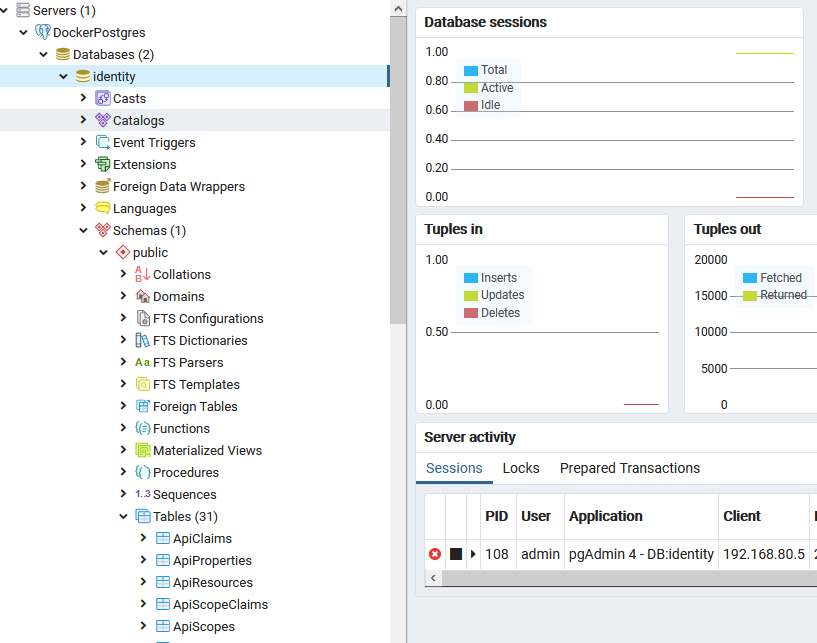
We can now run Postgre queries and sql commands to look at or manipulate our data.
Seq
Looking at Seq is a little easier! We just need to go to the http://127.0.0.1.xip.io:5341 URL. Since we are in a single-user license and with no authentication turned on or hooked up, we'll simply land on the query screen!
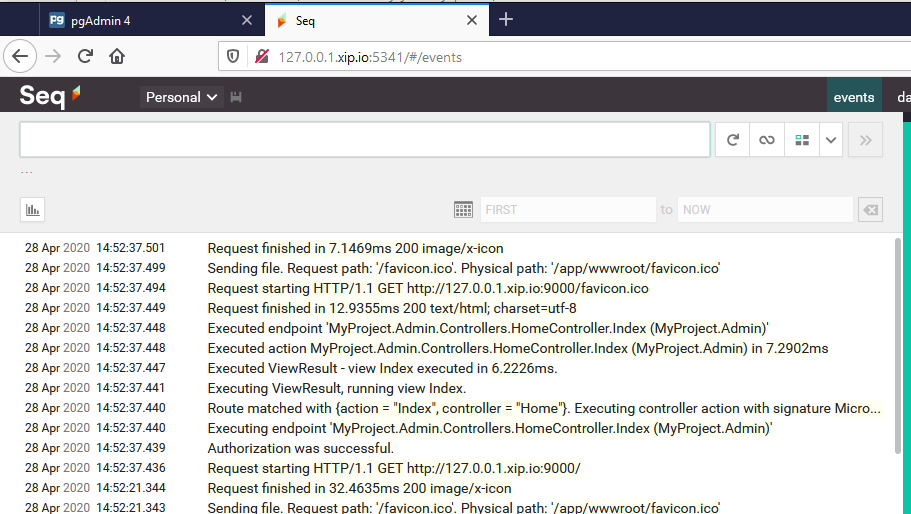
Now, we can start to just get a taste of the benefit of a embedded log-ingestion application. We can see that the apps are all logging into the Seq platform.
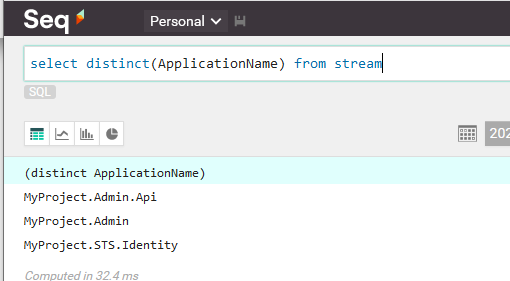
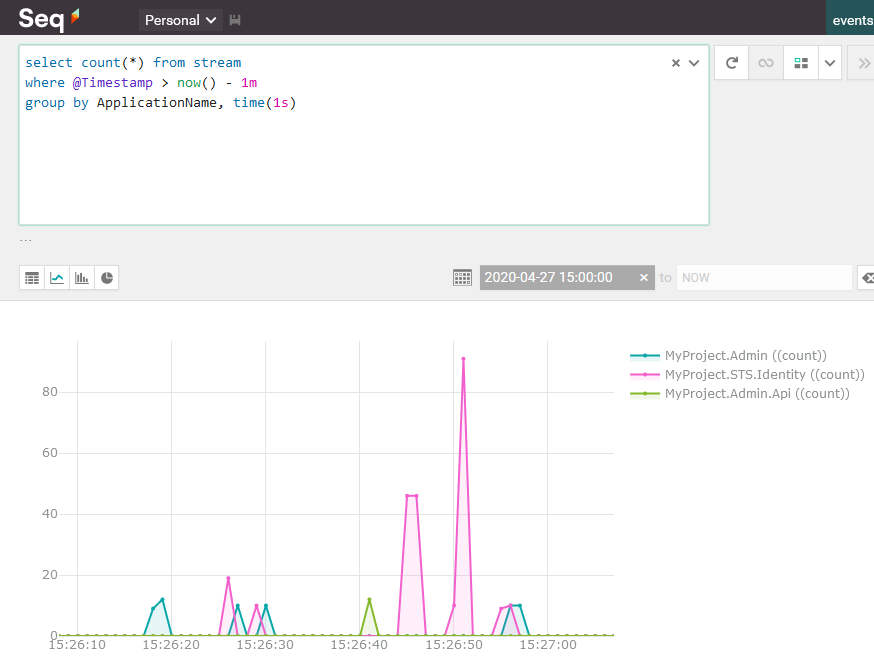
And now we can start to look at basic loads across all three applications in the same timeframe.
I'll leave a much deeper exploration of what Seq can do for you as homework! I know your probably already at home (or work?!?!) but I'm not going to directly explore Seq's capabilities in this blog post! I'll save that for another series. But you should definitely go check out Seq by DataLust.co.
I am not affiliated with Datalust or Seq in anyway. I get no money for this. I just really like the product.
STS
Database. Check! Database Admin. Check! Log Ingestion. Check!
Now we get to see the applications (finally) that is the reason we are doing all of the rest of this work.
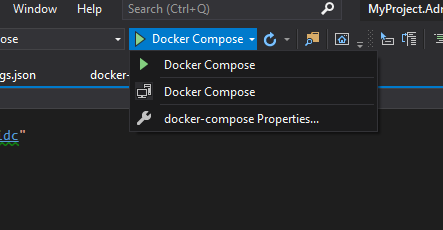
Ensure the DockerCompose project is running in Visual Studio.
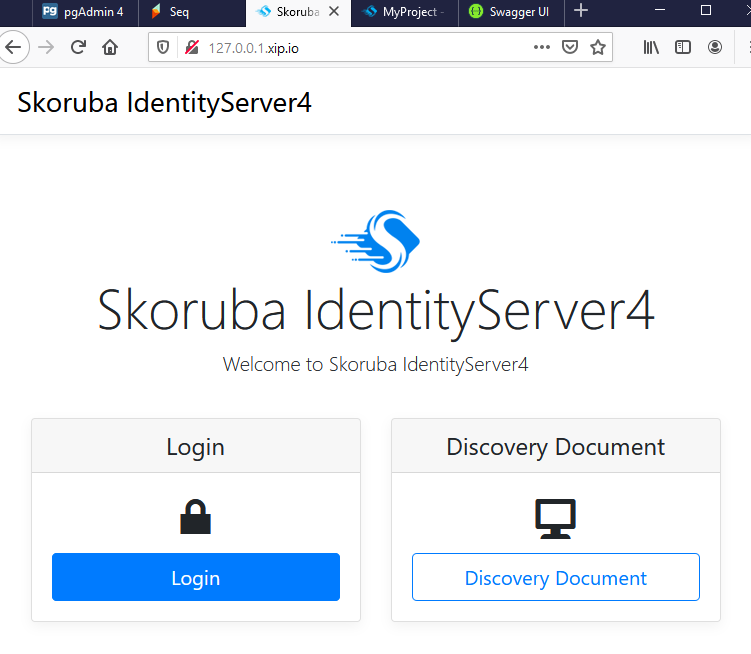
If you navigate to http://127.0.0.1.xip.io you will land on the STS login page.
If you have another web server running and serving pages on port 80 you may have a conflict here.
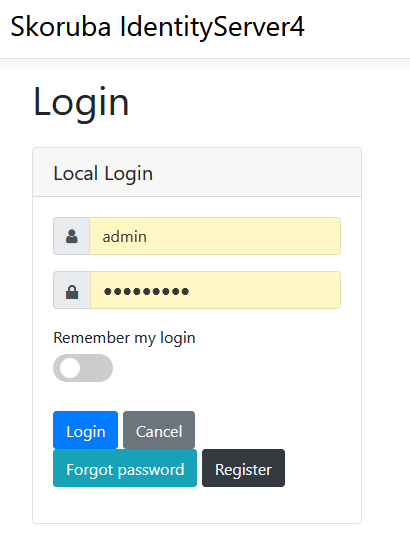
We can log into this application using the account that was created for us! We saw the admin account in the pgAdmin4 query of the Users table!
1 | { |
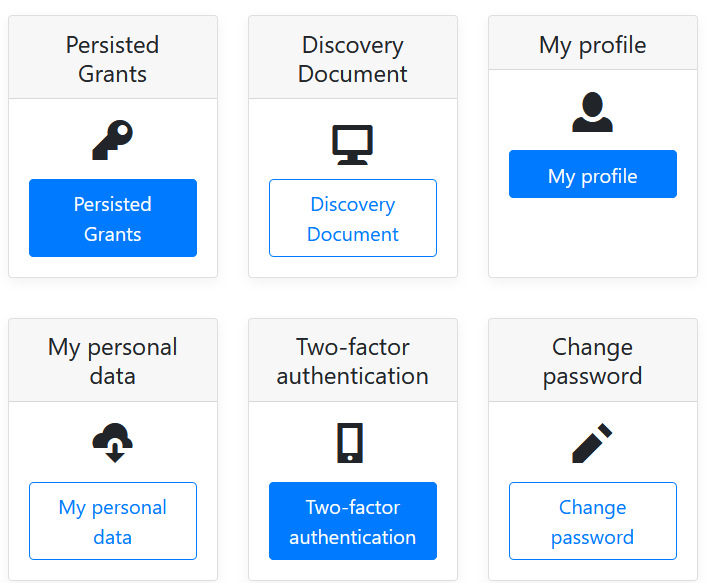
Once we are logged into the STS, we can see that users can manage their details. They can look at the applications they've granted permissions to, they can look at their profile data. They can delete their personal data, turn on MFA, and change their password! Phew!
Again, I'll leave a deeper exploration of the STS for homework. You should have enough familiarity after working through the IdentityServer4 Quickstarts that most of this will seem familiar. Also, this is only the user profile information, so it isn't exciting.
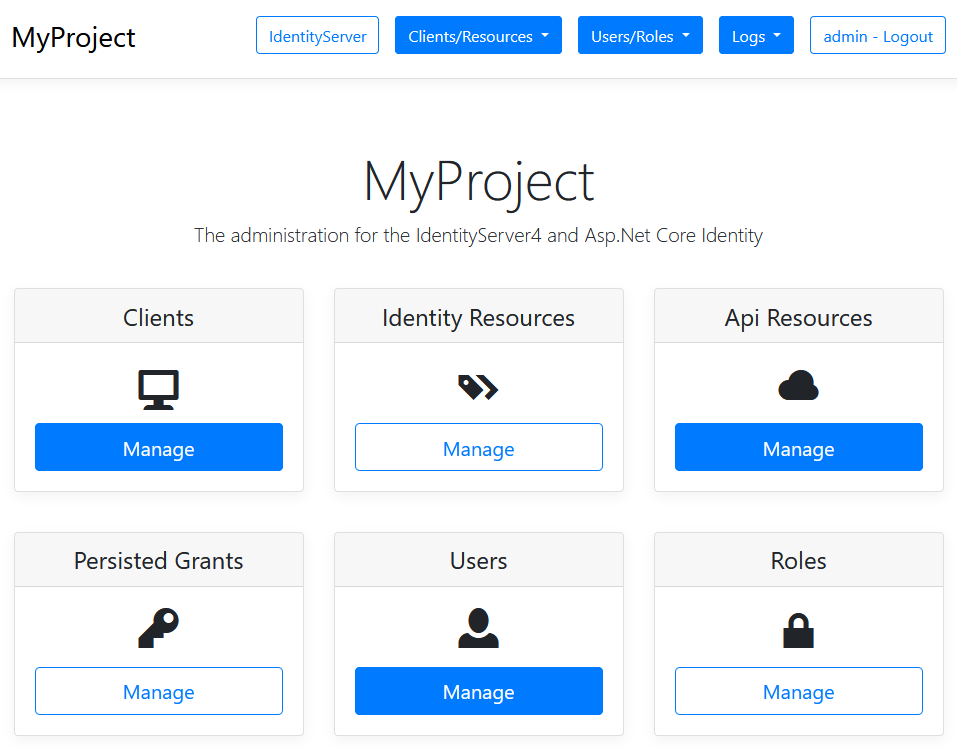
Admin
Next, we'll open a tab to the Admin application. If you are already logged into the STS, you won't be challenged for a username/password but have no doubt, you were authenticated!
Navigate to http://127.0.0.1.xip.io:9000 you will land on the Admin application landing page.
If you were not logged in, you would have been re-directed to the STS to enter your credentials, prove who you were, and then returned to the Admin page. Give it a try. Log out of the STS and try going to the admin URL again!
There is a lot to learn about administering an IdentityServer4 implementation. I'm going to cop out again and leave you to explore this as homework.
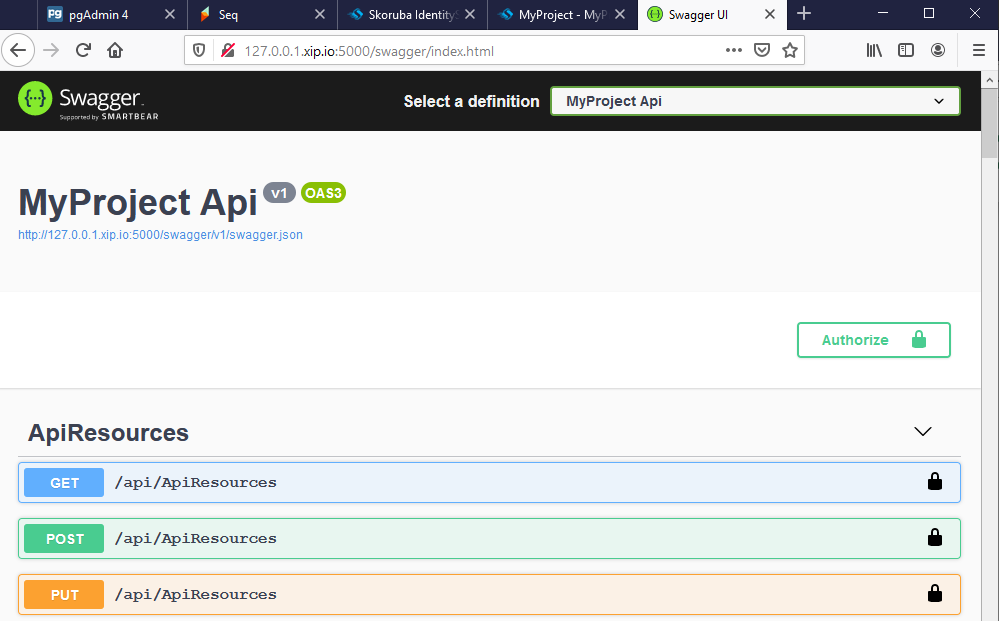
Admin Api
Last but not least, the Swashbuckle Api Explorer application (swagger) that is embedded in the AdminApi project!
Navigate to http://127.0.0.1.xip.io:5000/swagger you will land on the Admin WebApi ApiExplorer page.
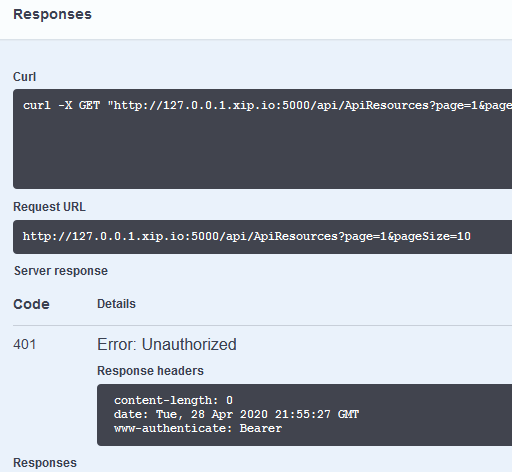
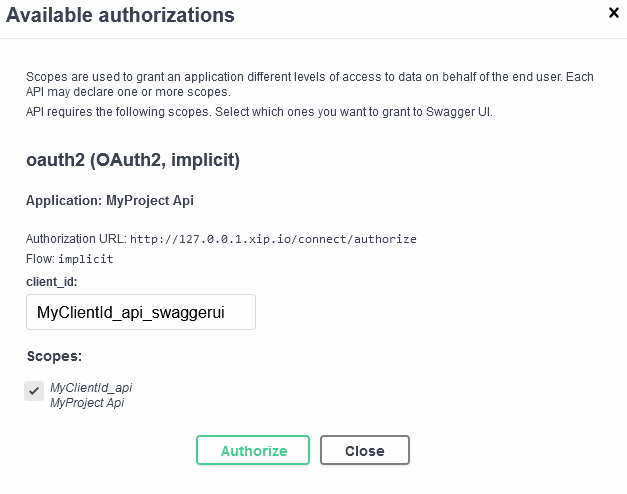
The Api Explorer is already setup to leverage token-based authentication, so if you hit the Authorize button, you'll be directed to log in (authenticate) with the STS (if you haven't already). If you are already authenticated, you may be asked by the Api Explorer app for your consent to use your profile details, but you won't have to type in your username/password again. And if you allow your consent to be remembered, you won't be challenged for it again.
If you execute any of the API methods before you are authorized, you'll get the dreaded 401 Unauthorized HTTP status code!
Now get authenticated!
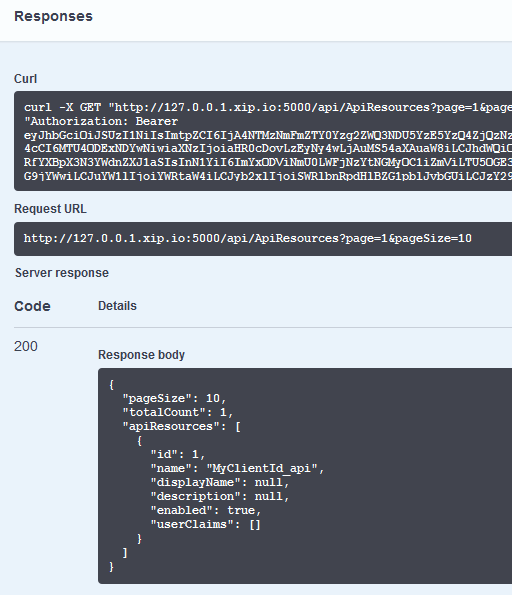
And this time, we are authorized and our API call succeeds!
Summary
Now that is it! Wow! That was a lot of work! But we have been rewarded by a fully functioning IdentityServer4 running on our machine with a Postgres DB as persistence, pgAdmin4 for database administration, and Seq for log ingestion!
One thing I didn't do for demonstration purposes is do any sort of custom-branding on the Skoruba applications, but they are just ASP.NET Core 3.1 web applications that you already know how to modify and enhance. The Skoruba template has a little bit of built-in branding configuration, but you can certainly charge ahead and make this look however you'd like.
So, there we go. We have a fully functional system running in Docker, but that isn't going to help us where we are going. Time for the next step and we move our platform to Kubernetes!!
