Previously: Getting Started with Kubernetes - Minikube - Part A
Getting Started with Kubernetes - Minikube - Part B
We're finally getting to the part of the series where we have a group of applications and we want to have them live in Kubernetes (k8s). In order to do that, we need to have k8s on our local development machine and we are going to use Minikube to do that.
Important Caveat
I'm going to make an assumption that at a minimum, you've reviewed various types of k8s resources on kubernetes.io and in a best case scenario, you've watched Nigel Poulton's Pluralsight course Getting Started with Kubernetes. If you haven't, some of the stuff I discuss will not have sufficient detail in this post to close the gap.
Also, my understanding of Kubernetes is certainly not as extensive as I'd like. I'm not sure I'd hazzard calling myself an expert. I've got a working cluster and applications in that cluster but I am not going to make the statement that I've done it all right or with the current best practices in place. This is a learning exercise for me (and you) and while I want to get you with a cluster up and running as soon as possible, I expect you to learn/challenge/grow your k8s cluster knowledge as well.
Continuing on...
So we've now deployed all of our backend services into minikube. There is a little detail that probably went un-noticed until now. Where did minikube get the container images from? In this case, it pulled the postgres, pgAdmin4, and Seq container images from DockerHub, a public container registry. So if you want to publish your custom-built Skoruba templates to DockerHub, everything will keep on working without any changes. But chances are, your going to want to publish those images to a private container registry such a DockerHub (private) or in my case, an Azure Container Registry hosted in our Azure subscription.
What about my local docker repository?
You may be asking, you've built your app locally and deployed it to Docker Desktop registry, why can't I just get it from there?
Minikube (k8s in the VM) has it's own docker daemon instance running, so now you have two docker daemons running on your machine. One in Docker Desktop and one in minikube. And the one in minikube didn't build/deploy your applications, the Docker Desktop one did. But minikube doesn't use that one. It uses its own internal docker container registry or a public/private one from the internet. I've read that you can use minikube's docker daemon for builds, but I don't want to make any adjustments to your environment that might break the Docker Desktop experience so we'll just continue on with creating a private container registry. We need to get there eventually no matter what, so let's keep going!
Azure Container Registry (ACR)
For this part of the journey, we are going to leave Visual Studio and the comfort of C# and yaml and journey to the Azure Subscription that we want to host our private container registry in!
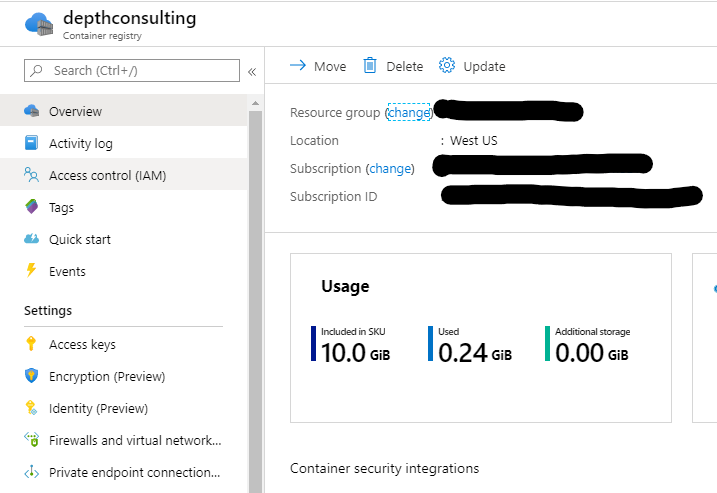
At this point, you'll need to have access to a Azure subscription. Microsoft has made it very easy to create them (they are free) and use them (there are lots of free services)! The ACR service is not free, but it is pretty inexpensive for the Basic SKU which holds up to 10gb of container images.
If an Azure ACR is not in the cards for you, you can continue (without my help for the moment) with a free DockerHub public registry, or a private container registry that you may already have access to.
For this part of the project, I'll be using my Depth Consulting Azure Subscription and Azure DevOps Service instance. My client, who has the identity management business problem, also has Azure DevOps Server 2019 and an Azure subscription that holds their private ACR.
Creating the ACR
Creating a ACR is very easy.
- Log into the Azure Portal
- Create a new ACR Resource
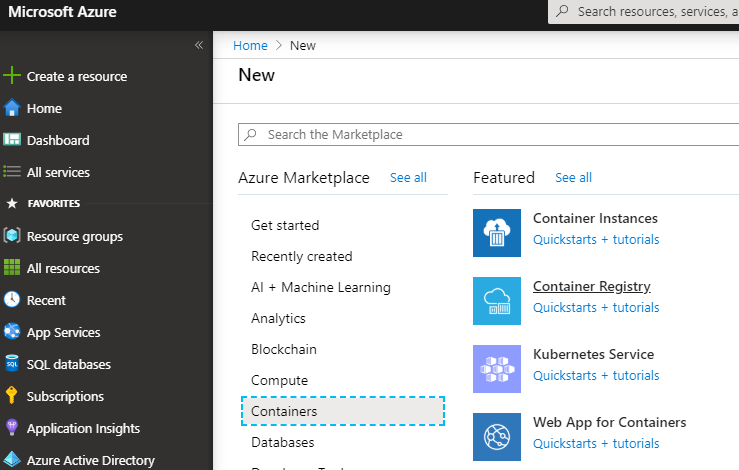
- Follow the wizard and complete the creation of your ACR
- pick the Basic SKU. It is more than enough for now and you can upgrade later.
- The Basic ACR costs about $0.17 per day for 10GiB of storage.
Tada! ACR created!
I could create the ACR via Pulumi but it is a one-and-done kind of activity, so I didn't do that. It's just easier to create it in the portal.
Secrets! Secrets! Secrets!
In order to access a private container registry, you need credentials! And more specifically, your k8s cluster needs the credentials for your private container registry. And it isn't just k8s that needs those credentials, your DevOps pipeline will need those credentials as well in order to publish container images into the registry.
Our ACR credentials are available in the Azure Portal. You can find the ones we'll need there.
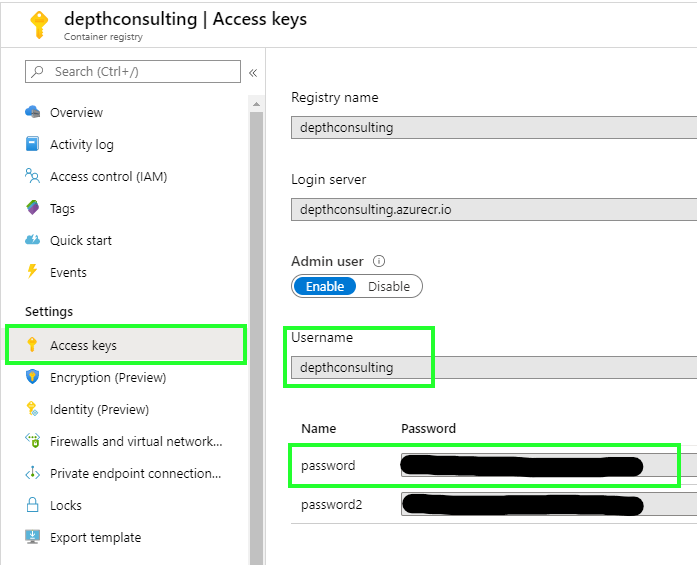
Remember where they are. When we get back to manifest land, we'll need them.
Azure DevOps Service (Server 2019)
Now that we have a private container registry, we need to build our IdentityServer4 applications and publish those container images to our ACR. If you do not have an Azure DevOps Service instance, you can create one for free.
I will try to create blog post sometime doing something like this from GitHub, using GitHub Actions with a public DockerHub Registry.
Assumptions
I'm progressing on the assumption that your IdentityServer4 implementation projects have been checked into a git repository somewhere. If this is in an Azure DevOps Services instance, that's great, but it can be GitHub or any other repository that Azure DevOps Pipelines can monitor for changes.
Build and Publish in one Pipeline
The next step is to build and publish our applications. For this, we're going to leverage Azure DevOps Pipelines that contain a couple DockerCompose tasks. Thankfully, this is very easy to setup in thanks to the pipeline templates and the integration between Azure Portal and Azure DevOps Services.
-
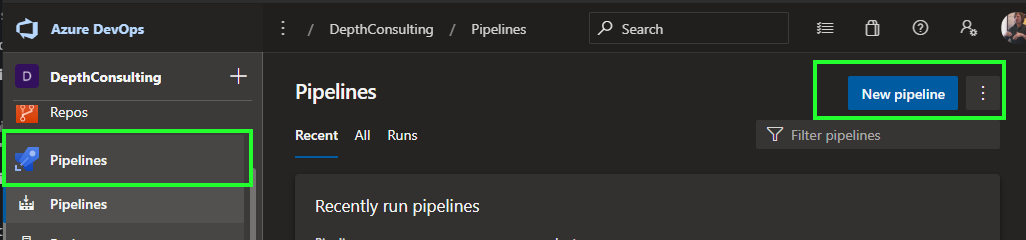
Go to your Pipelines in Azure DevOps Service instance
-
Create a new Pipeline
-
Connect the pipeline to your repository
-
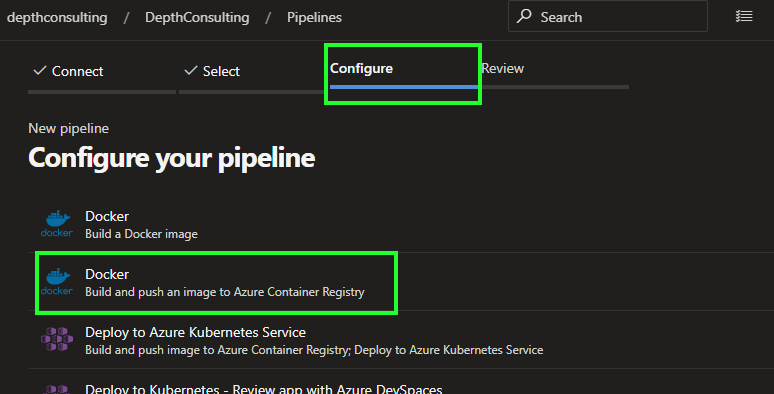
On the Configure your pipeline wizard step, select Docker - Build and Push an Image to Azure Container Registry
-
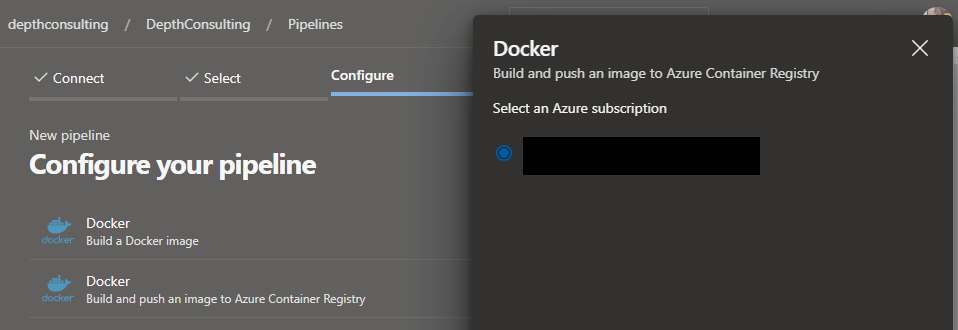
Select your Azure subscription with the ACR in it
-
Select your ACR that you want the images in
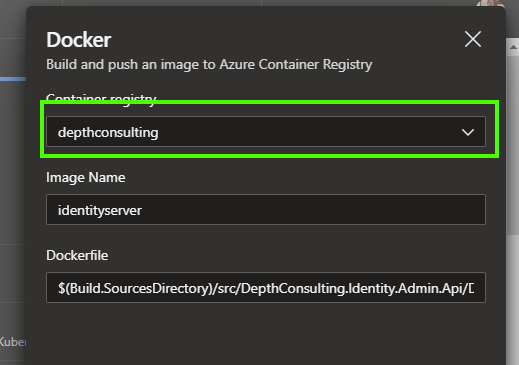
- don't worry about the image name or Dockerfile parameters. They'll be deleted in a moment
-
Create the new pipeline
-
Delete the whole Docker@2 task
1
2
3
4
5
6
7
8
9
10
11
12
13
14
15
16
17
18
stages:
- stage: Build
displayName: Build and push stage
jobs:
- job: Build
displayName: Build
pool:
vmImage: $(vmImageName)
steps:
- task: Docker@2 # <-- remove this whole task
displayName: Build and push an image to container registry
inputs:
command: buildAndPush
repository: $(imageRepository)
dockerfile: $(dockerfilePath)
containerRegistry: $(dockerRegistryServiceConnection)
tags: |
$(tag) -
Delete the Docker@2 task variables
1
2
3
4
5
6
7
variables:
# Container registry service connection established during pipeline creation
dockerRegistryServiceConnection: '<your service connection Id>'
imageRepository: 'identityserver' # <-- delete
containerRegistry: 'depthconsulting.azurecr.io' # <-- delete
dockerfilePath: '$(Build.SourcesDirectory)/src/DepthConsulting.Identity.Admin.Api/Dockerfile' # <-- delete
tag: '$(Build.BuildId)' -
With your cursor under the steps yaml entry, Add a Docker Compose task
- Work through the wizard and the Command is build
-
With your cursor under the last DockerCompose@0 task, Add another Docker Compose task
- Work through the wizard again and the Command is push
-
Save the pipeline and run it!
- You may need to give your pipeline permission to use a service principal to connect to the ACR. If you see that your pipeline is queued and waiting for persmission, go ahead and give it permission.
Your final pipeline yaml should look something like this.
1 | # Docker |
After the build has run, we should now see our IdentityServer4 container images in the ACR!
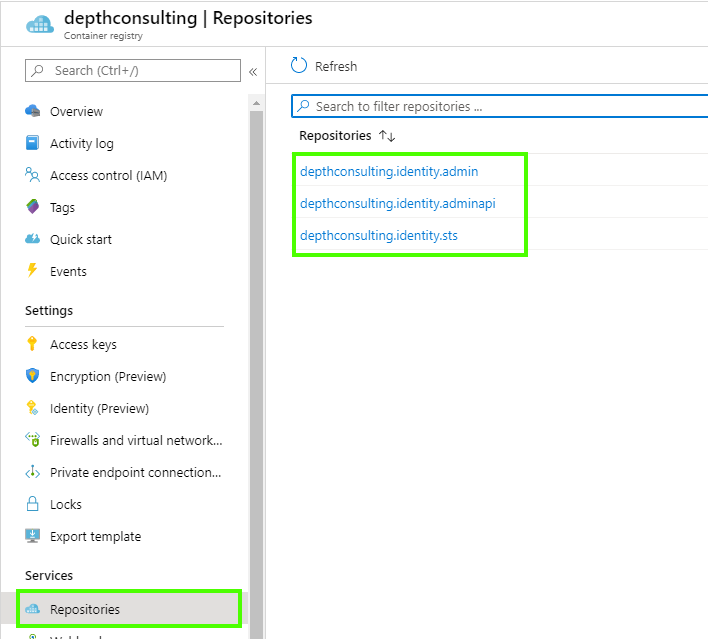
You should navigate the ACR repositories and look at what images are in each repository. Also, all of our images were tagged as latest so every time the build runs, we'll have new a latest image that will be pulled down as needed by the k8s cluster. I'll leave container image tag management to another blog post. We're just trying to get to k8s today.
Adding our ACR Secrets to minikube
Now that we have our IdentityServer4 applications published to a container registery, we need to give our k8s cluster the credentials that will allow it to pull those images down from the ACR into the cluster. To do that, we will create a k8s Secret resource.
For this step in the process, the easiest way to do this is to use kubectl to create a secret in the cluster.
1 | kubectl --namespace default create secret docker-registry docker-credentials ` |
Put this command in your start-up.ps1 file for now
This will create a Secret resource in the k8s cluster that it's docker daemon will use to access your private container registry. You can look at the secret that was created using kubectl.
kubectl get secrets
1 | NAME TYPE DATA AGE |
And you can look at the specific secret in yaml with kubectl as well.
kubectl get secret docker-credentials -o yaml
1 | apiVersion: v1 |
You could take this yaml and create a docker-secret.yml manifest file and declaratively create your secret. I'll leave that to you as homework.
Now our k8s cluster should be able to get the container images. We'll prove that in the next section!
Deploying our IdentityServer4 applications to minikube
Now that we have our applications in our container registry, we can build up the manifest files for these applications and we can reasonablly expect our k8s to be able to fulfill the Deployments that we have in those manifest files.
STS
Here is the deployment and service manifests for the STS.
Deployment Manifest
1 | apiVersion: apps/v1 |
Interesting entries in this manifest are:
- Labels are important. They match a Service to a Deployment
- We are telling the deployment where to get the container images from
- our Seq url is the DNS entry created for the Seq post in the cluster
- we are telling k8s to use the docker-credentials secret when trying to pull down the container images from our ACR
- this allows us to pull images from multiple private repositories if needed
Service Manifest
1 | apiVersion: v1 |
A simple Service manifest telling us that:
- use the type: NodePort to expose the STS service to the external network on port 80
- the label will hook this Service up with the pods with the matching label
Admin
Deployment Manifest
1 | apiVersion: apps/v1 |
Service Manifest
1 | apiVersion: v1 |
Admin Api
Deployment Manifest
1 | apiVersion: apps/v1 |
Service manifest
1 | apiVersion: v1 |
Now we can kubectl all of these manifests into our k8s cluster and we should see them all appear in the Web UI.
-
kubectl create -f .\sts-dep.yml -
kubectl create -f .\sts-svc.yml -
kubectl create -f .\admin-dep.yml -
kubectl create -f .\admin-svc.yml -
kubectl create -f .\adminapi-dep.yml -
kubectl create -f .\adminapi-svc.yml
Feel free to put put these into a single manifest file or any other combination that makes sense to you.
Now expose all of the services from minikube.
1 | # expose the services from minikube |
Inspect The Pods In Kubernetes
Now is a good time, before we go try to use these applications, to see if the Pods are up and healthy in your k8s cluster in minikube. If you haven't yes, you can use the minikube dashboard command to get to the Kubernetes Web UI or you can go to a command prompt and type octant to start that tool if you've installed it.
Octant
We're taking a look at the state of the pods now because with our approach to putting pod resources into k8s, we are taking an indirect path to getting actual pods running. Our approach is to:
- create a
Deploymentresource- which creates a
ReplicateSetresource- which creates
Podresource(s) as necessary
- which creates
- which creates a
In our previous steps, the backend infrastructure resources that we wanted running came from DockerHub (a public repository) and they are pretty easy to get started, so we were unlikely to see any Pod start-up failures. With our own Skoruba-based applications in a private repository, there is a greater chance that our pods will fail to start up, and we'd like to see that now.
Hopefully, everything worked and what you see in Octant is this:
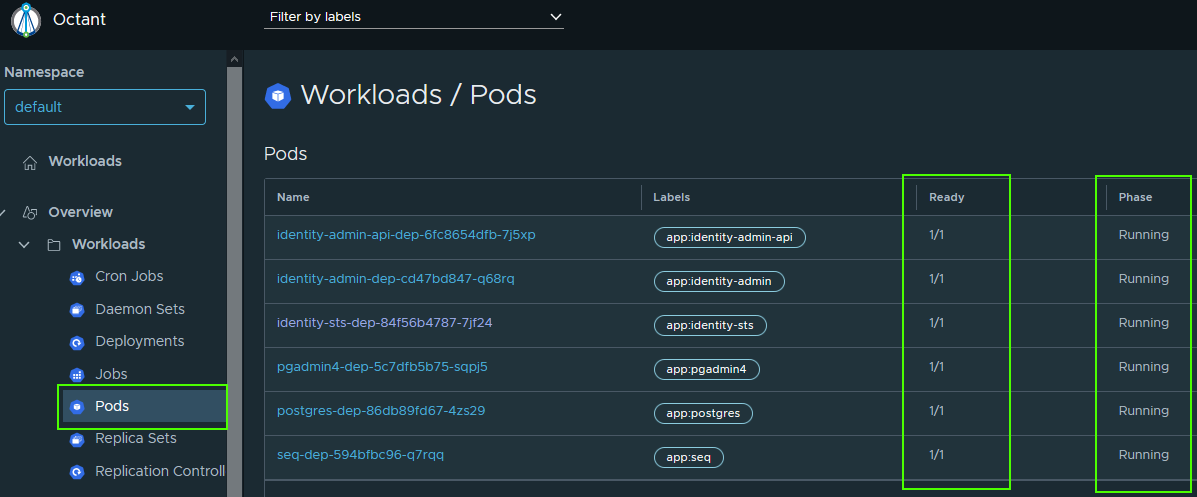
What we see in this image is all the pods having fulfilled their ReplicaSet replicas: pod count and that they are all running.
When I did this the first time, my Pods did not all end up running. I encountered for the first time the dreaded ImagePullBackoff error condition! This is a condition where the k8es control plane is having troubles acquiring an image, for any of a number of reasons, and is now slowing down the rate that it tries to acquire the image.


In this case, I've simply changed the image that the Deployment is trying to pull to create this error condition. If the image name is incorrect, this error condition will occur.
Another reason that it occurred for me was because I had my private container registry credentials wrong. If you are missing the docker-secret or you have the wrong username/password in that secret, you will also get an ImagePullBackoff error condition.
I'd encourage you to give this a try! You only need to kubectl apply -f .\identity-sts-dep.yml with an incorrect image name and you'll see this error. Change it back and apply again and you'll see it fixed. You could also remove the docker-secret to see how that affects things.
It should go without saying, that if you have this problem, you have to resolve this prior to continuing.
We need DNS entries for IdentityServer4
The combination of hosting our k8s cluster on minikube and running this all on our local machine and the fact that this is an bunch of Identity applications where the hostname is really important, we have to do a little extra work. You're going to want to put this into your start-up.ps1 file.
Update your Windows host file
We need to be able to use hostnames for our web applications, so we are going to have to alter our host file in order to make that happen. Here is a powershell script (that you should 100% review yourself!) that will udpate your host file to make this work with the 127.0.0.1.xip.io DNS/hostname. This should not damage your existing host file entries, but please back-up your hosts file first.
1 | # edit your workstations host file to add minikube ip and DNS alias |
This powershell script will change the way that the DNS system works on your Windows workstation. The hosts file takes precedence over a DNS query to the internet, so once we do this, our Windows machine will resolve the IP address we've stated and not the one that would have been return by xip.io. This will break our ability to use DockerCompose. Comment out the entry to use DockerCompose again. The alternative is to create separate domains/configurations for each environment (Docker & minikube) on your local workstation. This is a bit cumbersome with the way seed data is handled today, but it is a problem that could be solved.
You should now be able to visit the following URLs and only be challenged for your username/password once and you will be asked for consent from each set that you visit.
- http://127.0.0.1.xip.io - STS Landing page
- http://127.0.0.1.xip.io:9000 - Admin Application
- http://127.0.0.1.xip.io:5000/swagger - Admin API Swagger Api Explorer
With the Admin Application, if you have not already logged in, you should be re-directed to the STS login page, hence the single-sign on aspect of our authentication ecosystem!
Victory!!
So! I'm crossing my fingers (virtually and into perpetuity) that you've arrived at a place that you can test the IdentityServer4 applications (all three), running in a minikube-based K8S cluster! If you can't, you'll have to work at it a bit and if you really get stuck, try reaching out to me on Twitter! I'm usually paying attention to notifications there!
I certainly encourage you to explore and experiment with k8s and IdentityServer4 in this environment. With these instructions, your manifests, and a little bit of luck, you should be able to always get back to a known working state, even if that means a little bit of lost data.
You can always start from scratch very easily from a minikube k8s cluster perspective. The following commands will tear down and re-build you minikube cluster. This destroys everything and gives you a totally clean slate.
1 | minikube stop |
Our next stop will be a bit of a reflection point, and then, on to AKS!!
Next up: Pause to reflect
