Previously: Moving to Azure Kubernetes Service - Part B
Making Your Kubernetes Cluster Publicly Accessible
Hopefully you've arrived at this article with two Pulumi applications that you can use to create an Azure Kubernetes Service-based Kubernetes (k8s) cluster with a collection of k8s resources (container images) inside of it that all function together to provide a IdentityServer4 based authentication system. If not, you should probably go back and re-read those articles since we're going to build off of that effort in this article.
In this article, we're going to go through the process of making our k8s cluster publicly accessible with proper DNS entries (hostname) so that the authentication system can be configured and works properly.
Pre-requisites
Up until now, I've done my best to ensure you can do as much as possible on your developer machine with minimal financial requirements. From this point forward, I will be assuming that you have a custom domain that you can use for your configuration. On my part, I will be using the codingwithdave.xyz domain for the remainder of the articles.
Daily Ritual
I want to share a side-note about one of my processes.
One thing I really appreciate about my infrastructure automation while I'm doing all of this development and writing is the ability to stand up and tear down the k8s cluster every day. I start my day by doing a pulumi up command and it stands up all the cluster. I do another pulumi up and it puts all of the applications in the cluster. And at the end of the day, I reverse my start of day activities by doing a pulumi destroy on the resources and then a pulumi destroy on the cluster itself. I do this for two reasons. First, it saves money. This cluster only runs when I'm working on this article or doing some k8s research and then it goes away. This is a great benefit for a development process. Second, it forces me to make sure that my automation is working at the beginning and end of each day.
Standing up the k8s cluster daily makes this get-credentials command a nice output that we capture in Pulumi. This is generated in the Pulumi application that stands up the aks services. All of my k8s development tooling uses this set of credentials.
1 | az aks get-credentials --resource-group rg_identity_dev_zwus_aks --name akscluster5b1237c2 --context "MyProject.Identity" |
This command changes daily, so having this change captured in standing up the infrastructure so I can just go to my Pulumi service to pull it out and use it, is certainly helpful. Hey @Pulumi if you are reading, I'd love a copy-to-clipboard-button beside my Outputs in the service page for my stacks!
Consider rate limited activities like Let's Encrypt when standing-up and tearing down resources.
Ingress and Ingress Controllers
A k8s cluster, kind of by default, is a closed system. You can access it administratively which is certainly dangerous, but unless you make conscious decisions about how and when to expose your services, only the cluster services themselves are exposed so that tools like kubectl can work. There are a number of mechanisms for exposing your services but in this article, we are going to discuss the Ingress resource and the IngressController resource as the means by which we expose services in our cluster to the public.
Ingress Controllers
In order to expose the IdentityServer4 services, my first step was to create an IngressController resource. An IngressController is something that you put into your k8s cluster that will watch for Ingress resources, interpret them, create the appropriate external resources for your cluster to interact with the outside, and then route all traffic that comes in through your ingress point to the appropriate services inside of your cluster.
There are many IngressController implementations that you can use, and if you find that you don't like one after a bit of use, it isn't terribly hard to change to another one. There are certainly considerations to make when picking on, but for me, honestly, it was originally ease of getting it working, so I choose the nginx IngressController. There are many examples of how to put this controller into your k8s cluster and how to create the Ingress rules that nginx will follow.
For the IngressController, there is no manifest. I didn't put one into the minikube instance. So we'll only have Pulumi code for this part of the journey.
Deploying nginx Ingress Controller
Up until now, we've mostly been dealing with single-container resources. A self-contained application that for the most part can provide it's own bit of functionality. Arguably, the IdentityServer4 group of containers should always be deployed together, but I haven't set that up yet. The way that you do that in k8s is by using Helm, basically a package manager for your k8s resources. Eventually, I will figure out how to author a Helm package, but for the time being, I'm just going to use them.
Installing Helm is very easy. In our case, on Windows, we can use chocolatey to install it.
choco install kubernetes-helm
This documentation has more detailed instructions.
Once you have Helm installed, Pulumi is capable of using it to push Helm charts into your k8s cluster.
To give you a sense of what a Helm chart will do to your cluster, you can see that when we ask Pulumi to put a Helm chart into the cluster, a lot of things actually happen.
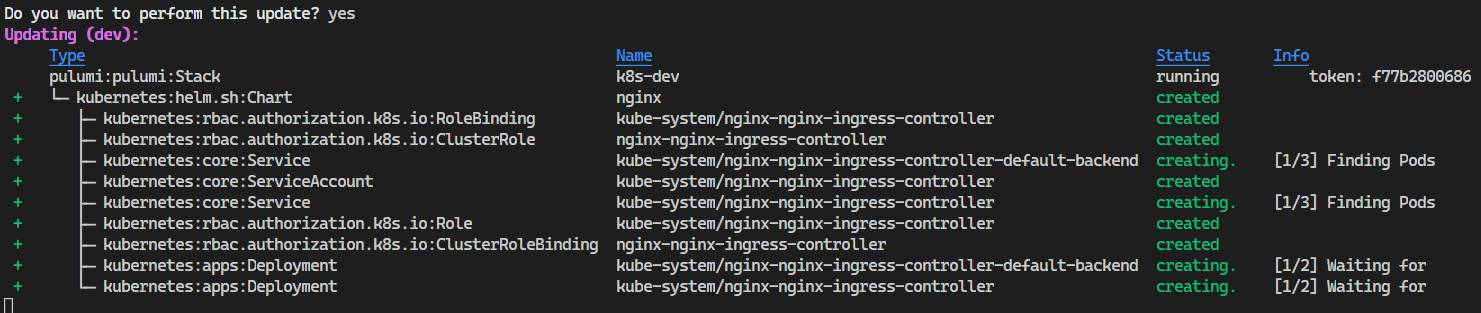
Let's take a look at the pulumi typescript code required to install this Helm chart.
1 | // Deploy ingress-controller using helm to AKS Cluster |
Most of the parameters in the ChartOpts parameter of the object we created are easy to understand.
- chart - The chart we want to install
- namespace - The namespace that we are going to put this chart into
- repo - The Helm repository to get the chart from
After that, we get into some options parameters that are a bit harder to deduce and I had to dig a bit into how Helm works to understand them and what Pulumi needed in order to make this work.
In our options we have created a values object that has additional properties. The values object is how we pass configurable values into Helm. This is comparable to the values.yaml in the chart definition. There are a number of different ways to pass in these values when using Helm charts directly, but this is how Pulumi provides these values to Helm.
When trying to figure out what Helm chart options are available, it can be helpful to look at the default values.yaml in a chart's definition. Here is the Nginx Ingress Controller Charts default values.yaml file.
There are a couple simple parameters in our values object.
1 | resources: { requests : {memory: "150Mi", cpu: "100m"}}, |
This are parameters that are for the kubernetes resource for what will eventually be provisioned in k8s. They are resource requests for the Pod template in the Deployment, the service type for the nginx Service resource, and a nodeCount (replicas) for the Deployment resource.
The next part of these values is where we encounter some of the complicated aspects of IngressControllers. They are a resource in your k8s cluster that needs to work with things outside of the cluster. In this case, the nginx IngressController needs to be able to talk to Azure and create a LoadBalancer and PublicIP outside of the cluster. The same nginx IngressController would need to talk to AWS if this was deployed there. We can give these IngressControllers some information that helps them understand which external provider to work with and what that provider needs. We can add provider-specific values via annotations which could be provided in the values.yaml file but in our case, we will provide them via the values: object in the Pulumi ChartOpts class.
1 | service: { |
In this case, we are telling the IngressController to tell Azure that we want to use k8sDnsName as the DNS name label on the PublicIP that is created for our load balancer.
NOTE
At this time, this annotation is not working. I'll update as soon as I figure out what is going on.I've updated the code snippet as I've figured out how this works now. Another blog post (short) will be written up.
Now that the Pulumi script is working, we don't need to use this PowerShell but I will leave it here as an example of using the azure-cli with some PowerShell. After our IngressController has been provisioned, we can run this PowerShell script against the azure-cli command to do this for us.
1 | # get the PublicIP object for our load balancer |
The important thing about this activity in regard to progressing toward a working IdentityServer4 implementation is that we now have a single public IP address that we can create DNS entries for. We also have a single DNS entry provided to us by Azure that we can use as a CNAME entry, but we still need individual DNS entries for each service that we are going to expose.
We aren't quite done yet though. We have 3-5 apps (depending on how you feel) that we need to expose as separate applications from our cluster. In order to do that, we need to a couple more things.
For the next steps, let's assume that:
- our the FQDN is identity-auth-dev.westus.cloudapp.azure.com
- our public IPv4 is 137.135.18.68
I abandon IP address all the time. Please don't expect this one to work. After this effort, I wouldn't expect the FQDN to be around either. It might be, but don't count on it.
Configuring Public DNS Records
In order to make this authentication system work on your custom domain, you can simply take the following sub-domains and make a CNAME entry in your DNS provider for each that points at our Azure-provided DNS entry.
| Record Type | Name | Value | TTL |
| CNAME | auth | identity-auth-dev.westus.cloudapp.azure.com | 1hr |
| CNAME | auth-admin | identity-auth-dev.westus.cloudapp.azure.com | 1hr |
| CNAME | auth-admin-api | identity-auth-dev.westus.cloudapp.azure.com | 1hr |
I'm no longer trying to keep this all on my local machine. There are no hosts file instructions going forward.
Give it a try
After a quick pulumi up with the IngressController code added to our application, we should have a couple new Azure resources and a bunch of new k8s resources.
In Azure, you should find:
- A load balancer
az network lb list - A public IP
az network public-ip list
In k8s you should find a bunch of nginx-based resources in the kube-system namespace. This should show you some, but not all, of these resources.
1 | kubectl get deployments --namespace kube-system -l app=nginx-ingress-controller |
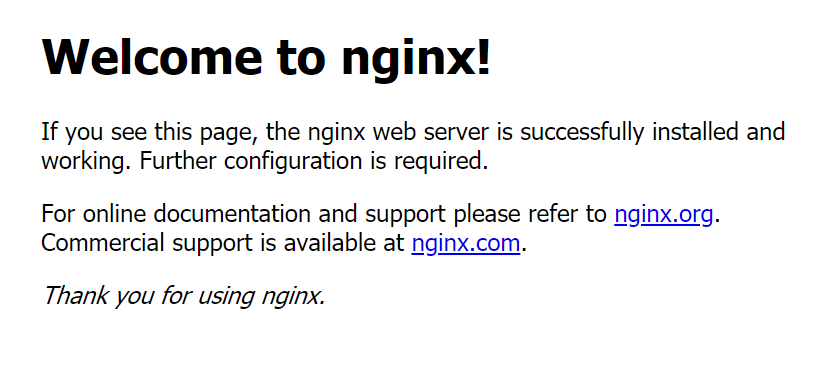
The great thing about the nginx IngressController Helm chart is that it installs a default backend for all un-managed routes. We will add rules for managing routes in the Ingress resource next, but until then, if you go to any of the URLs we setup, they should all work, with all of the traffic getting routed to the nginx backend web server!
Now, lets add certificates!
Certificates
Big Caveat Here
If you are still trying to use the host-file approach to access your applications, you won't be able to follow all of my steps for adding certificates management or HTTPs to your cluster. You will need to step outside of these articles to figure out how to provide a certificate to cert-manager that you can use. My guidance uses lets-encrypt and lets-encrypt needs to be able to access your public DNS entries to ensure that you are who you say you are. At this point, you should probably start thinking about getting a custom domain to make all of this a bit easier.
Adding cert-manager
One of the goals of the project was to ensure that everything has certificates, is using HTTPs, and it is easy to manage. With k8s that is very easy with cert-manager. In this case, we simply need to install cert-manager into our cluster with some pulumi code.
1 | // setup cert-manager |
This file, which you can look at on github, will install a lot of resources into your k8s cluster. You don't need to know a lot about them to use the certificate acquisition properties. I'm using lets-encrypt so I need to understand any limitations or restrictions imposed by them which in this case means the rate limits for acquiring certificates. These are important to understand so please read up and manage your certificate usage appropriately.
Adding a ClusterIssuer
Once cert-manager is installed into your cluster, it will be able to acquire/issue local cluster self-signed certificates. If you'd like to acquire certificates from Let's Encrypt or another supported issuer, you need to add an Issuer or a ClusterIssuer resource so that cert-manager can get certs. In our case, we are going to add two ClusterIssuers so that we can get staging certificates from Let's Encrypt and we can get production certificates from Let's Encrypt as well.
You should also take into consideration that we are using nginx as our IngressController. Each IngressController will have different configuration and classes that you need to setup and use.
Currently, Pulumi doesn't have a API/SDK module for cert-manager so we need to create a .yaml file and then use Pulumi to read it and bring the resources into the cluster.
1 | # filename: ca-cluster-issuer.yaml |
1 | // create certificate issuers for lets-encrypt |
Once you've created this .yaml file and TypeScript fragment, you can pulumi up to get these resources into your cluster.
Ingress Resource
Now that we have cert-manager installed and issuers configured, we can add our Ingress Resource.
An Ingress resource tells an IngressController what rules to setup for accessing services in the cluster. You can switch IngressControllers if you need to and the Ingress resource may not have to change. The rules can stay the same as long as the controller supports all of the rules laid out in the Ingress resource.
1 | const ingressName = "identity-ingress"; |
The rules in this particular Ingress definition are all using host-based rules. When someone visits our IdentityServer4 sites, the host-name that they used to get there will be pulled out of the request, and the nginx IngressController will look for that host in the rules, and if it finds it, send the request to the appropriate service. If it doesn't find it, it goes to the default backend controller.
Internally, the k8s cluster only uses http. I'm sure there is a security reason to have HTTPs everywhere internally in the cluster, but I don't understand why, so I haven't implemented any of that.
In these rules, we can see we need to declare a host and the path. Once that is in place, we simply describe what service to go to, using the internal k8s DNS entry and the port.
If you are using cert-manager, you can see that there are some instructions in the ingress for cert-manager.
- "cert-manager.io/cluster-issuer": "letsencrypt-staging" - this tells cert-manager to use letsencrypt-prod generates production certificates but also has important rate limits
- tls:[{ ... }] - this parameter will be used by cert-manager to determine what domains to generate certificates for.
At this point, you should now be able to pulumi up and add cert-manager and the Ingress resource to your cluster. This will do a lot of things for you. If you are not generating production certificates, you should use the "cert-manager.io/cluster-issuer": "letsencrypt-staging" issuer in cert-manager. There are no rate limits on generating staging certificates. If you are generating production certificates, you'll need to switch to the letsencrypt-prod issuer and understand the rate limits.
Once that is done, you can start visiting your sites and you should hit something other than the default nginx backend.
- https://auth.codingwithdave.xyz - STS landing page, should work
- https://auth-admin.codingwithdave.xyz - Admin landing page, not default backend, won't work
- https://auth-admin-api.codingwithdave.xyz/swagger - Swagger page, won't work, CORS error due to configuration
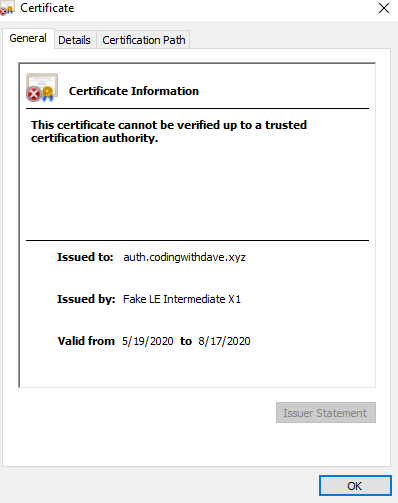
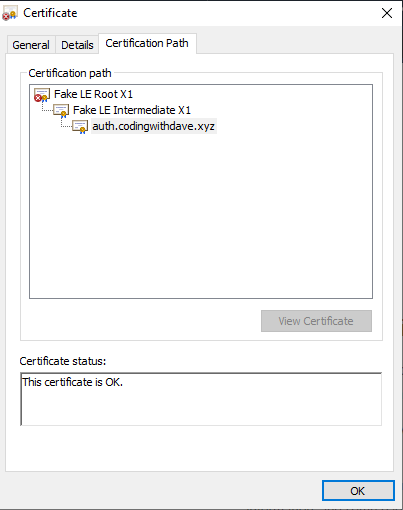
If you used the letsencrypt-staging ClusterIssuer then you are going to get certificate error, but you can inspect the certificate before you acknowledge and continue. The certificates and certificate path should look like the following:
In the case of the STS, you should land on a functioning page. You should be able to login with admin/P@ssw0rd!
For the Admin site, you should not land on the default backend, but you will probably land on a developer exception page because the admin site configuration in the IdentityServer4 database does not have the correct URLs anymore. We'll fix that in a moment.
For the AdminApi Swagger page, you should see the Swashbuckle Api Explorer frame, but the app will complain that it has a CORS issue. This will also be fixed by configuration now that we know our host names.
But this is progress! We are now able to access our services in the cluster!
Updating our Client Configuration
In order to fix all of our sites and get all of this working, we need to make some configuration changes in the IdentityServer4 database and in the Environmental Variables for our ASP.NET Core sites. Let's do that quickly.
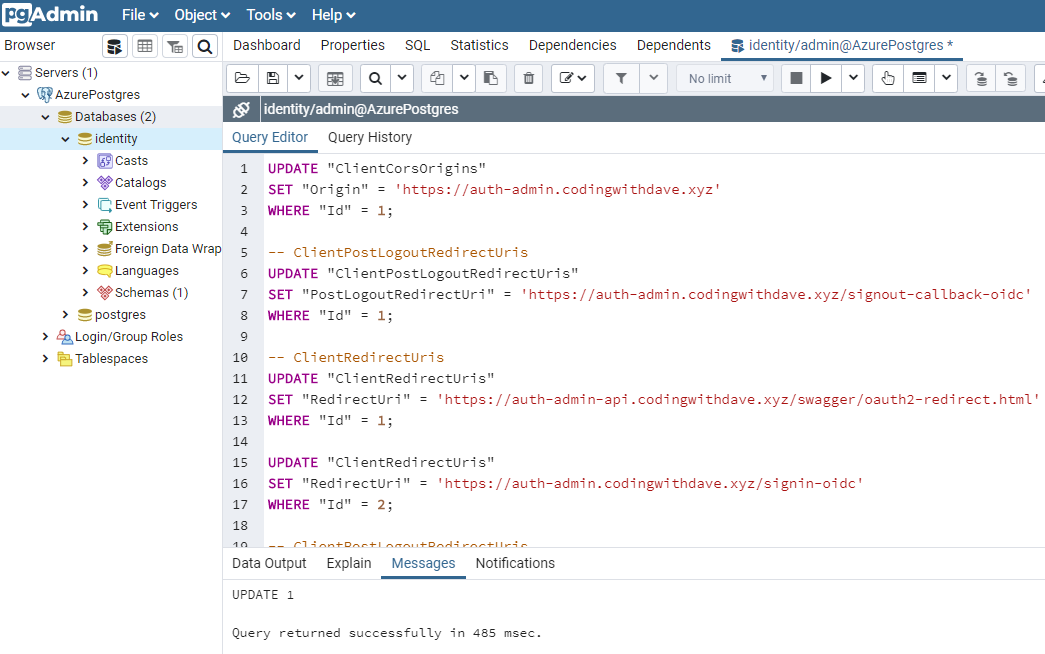
For now, we have not exposed pgAdmin4 via the Ingress rules so we are going to need to connect to our cluster, create a port-forward to our local machines, and then browse to the pgAdmin4 app to do our data configuration changes via sql. I'm going to do this via octant again. We did exactly this activity back in this article.
Once you have pgAdmin4 open and connected to our postgres database, we can run the SQL script below in pgAdmin4.
Remember to ensure the custom domain we are using is corrected in the scripts.
I am using https for all of these examples.
1 | -- ClientCorsOrigins |
We also need to update the configuration for the environmental variables for our IdentityServer4 applications in our pulumi script. You will find these lines (approximately) in 3 Deployment resources in our scripts. You need to update them all.
1 | // find these lines in deployment env: [{ }] blocks and make the appropriate custom domain name changes |
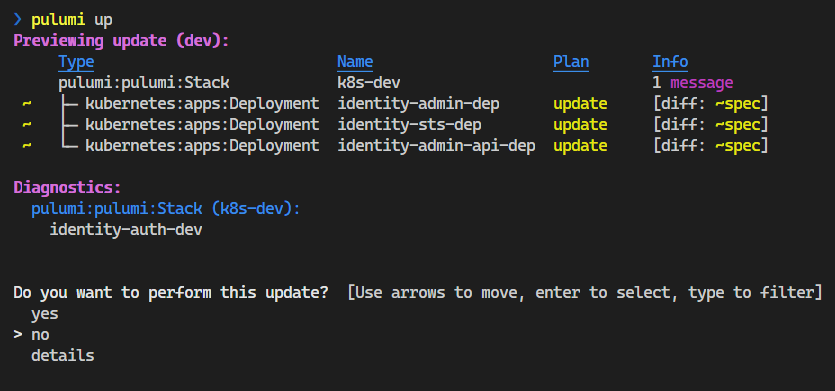
Once you've changed your pulumi application, a simple pulumi up will get everything setup for you.
We should now have functional (or mostly functional) set of applications! If you used the letsencrypt-staging certificates, the Admin site will generate SSL errors since it can't create a valid TLS connection yet.
nginx, IdentityServer4 and Aggravation
When this cluster and Pulumi application were originally written, I had this problem. When I started writing these articles and building the assets, it went away. I'm guessing that a default in nginx changed in one of the containers, but I'm not certain. I'm going to leave this here as a precaution.
So, configuration is changed, services are running, everything is accessible, and you log into the STS. This works! Check the Admin Api Swashbuckle API Explorer and our page loads! But you can't log into the Admin application! What is going on!?!?
This particular problem vexed me for several days. I had gotten to this point pretty early in my journey, and I've done some (not all) things in these articles so far to help you have a chance to not spend several days on this problem or a problem like this one.
One thing I've done is the Seq log ingestion. You should be able to port-forward to the Seq application and look at the logs for our IdentityServer4 applications. This will allow you to see all of the applications logs in one spot. When I was looking at the Seq logs, I could see that some traffic simply wasn't flowing between the STS and the Admin application when a use performed an action. Technically, when you try to log into the Admin application, you go to the Admin application first, it determines you are not logged in, and then it re-directs you to the STS application to log in. Via Seq, I saw that this was not happening.
But there were things that I couldn't see directly in Seq, which was the motivation for our next chapter, but for now, the way this project is currently configured, you will miss log entries from all of our other applications/resources in k8s like nginx, coredns, and kubernetes itself.
In this case, I went to the nginx log entries and saw some problems that indicated that something was too small to handle the communications with STS.
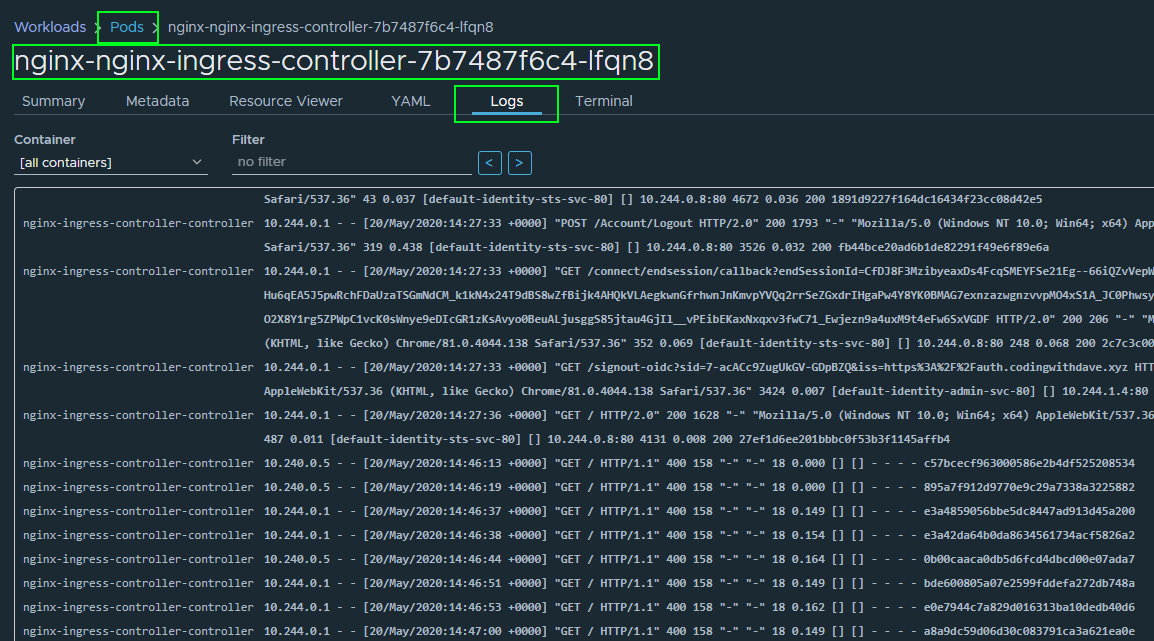
In the logs, I found this error.
upstream sent too big header while reading response header from upstream
That little error snippet ended up sending me down a path where it took a couple days to refine my google-foo enough to find the solution to this problem. I tried a lot of different tricks during those couple days, but amazingly, I eventually found this exact problem on another blog that I read a lot, but I hadn't read this article! Andrew Lock does a LOT of good writing for the .NET community and he had run into the exact same problem 2 years earlier!
Andrew Lock - upstream-sent-too-big-header-error
Andrew fully describes the problem in a really good way. I'm not going to repeat it. I had the exact same problem and his solution worked. What I am going to present is the Pulumi application code that creates a ConfigMap that nginx will find to make the adjustments.
Morale of the story - You have to be ready to explore ALL of the logs in your cluster. If you have to do it manually, you should still be prepared to do it.
1 | const nginxIngressControllerConfigMap = new k8s.core.v1.ConfigMap("nginx-nginx-ingress-controller", { |
Summary
We have arrived! If everything is going the way I hoped if not necessarily the way I planned, you (and I) should have a functional, basic Azure Kubernetes Service-based k8s cluster running an IdentityServer4 implementation in a completely self-sustained manner. It is publicly accessible, our backend infrastructure is not exposed but is accessible, and you can begin integrating your application into this authentication system.
My hope was that you were going to share my learning journey so that you could have a hands-on platform to continue your learning journey. Mine certainly isn't done. The next step is to show you how I made my logging a lot more comprehensive in a very easy manner!
Next up: Adding Cluster Logging (fluentd)
